No-Bake Lychee Cheesecake 免烤荔枝奶酪蛋糕
No-Bake Lychee Cheesecake 免烤荔枝奶酪蛋糕 - Pureed Lychee gives this cheesecake a light and soft texture with subtle tropical fruit flavour and it goes brilliantly with the buttery digestive biscuit base. This perfectly lite sweet melt-in-mouth creamy cheesecake is wonderfully delicious and sensational!
I have been wanting to do this for the longest time and I'm happy that I finally made it for this special occasion - my husband's birthday.
He is the guy who never appreciate fancy decorated cakes, so what I did was as simple as possible. Just placed some leftover lychees and lustred gooseberries on top and that's all for a simple yet elegant Lychee Cheesecake.
The taste was absolutely good, both the husband and son loves it and gave 2 thumbs up! :)
Ingredients:
材料
Crust:
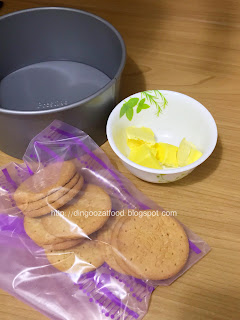
150g Digestive Biscuit, finely crushed 消化饼干碎 150克
60g Unsalted Butter, melted 牛油 60克,融化
Filling:
250g Cream Cheese 奶油奶酪 250克
200g Whipping Cream 动物性鲜奶油 200克
50g Plain Yoghurt 酸奶 50克
125g Lychee Puree (blend canned lychee into puree) 荔枝泥 125克,用罐装的荔枝打成泥状
1 tbsp (full) Gelatin Powder 吉利丁粉 1汤匙满
50g Water 水 50克
80g Icing Sugar (can be reduced to 65g for less sweet cheesecake) 糖粉 80克
1/2 tbsp Lemon Juice 柠檬汁 1/2汤匙
Cake pan: 7" or 7.5" round removable base. 七寸蛋糕模
If you are sharing this recipe, kindly attach the link to this blog instead of screen capture/ copy & paste/ use in your blog. No parts of the content of this blog may be reproduced without prior written permission. All rights reserved. Thank you.
如果您要分享此食谱,请联系这个部落格的相关链接。敬请不要复制或改篇为自己的食谱。谢谢!
Method:
Crust:
1. Combine digestive biscuit and melted butter.
消化饼干碎和牛油拌均。
2. Spread onto the cake pan and press down with the back of a spoon (or with cleaned hand). Refrigerate till set, at least 1 hour.
铺在蛋糕模底部,压平。放进冰箱冷藏1小时。
Filling:
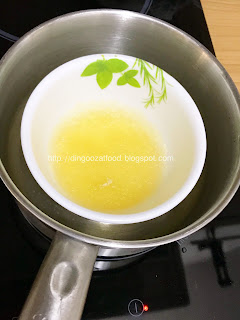
3. Measure water into a bowl and sprinkle in the gelatin (without stirring with a spoon). Set aside for 10 minutes.
吉利丁粉撒在水里,待十分钟。
4. Place bowl in a larger pot of hot water. Once the gelatin melts, remove from heat and set aside to cool to room temperature.
隔水融化后待凉。
5. Meanwhile, beat cream cheese and half of the icing sugar together until smooth and creamy.
奶油奶酪和一半的糖粉用搅拌器打至顺滑。
6. In another mixing bowl, beat whipping cream and the remaining icing sugar until stiff.
另外,把剩余的糖粉加入动物性奶油,打发。
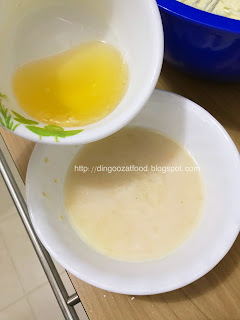
7. Combine lemon juice and lychee puree. Stir in gelatin to lychee puree.
柠檬汁加入荔枝泥,拌均。加入吉利丁液,拌均。
8. Add yoghurt into cream cheese mixture, mix well. Fold in lychee puree and whipped cream.
酸奶加入步骤(5)的奶油奶酪,拌均。拌入荔枝泥和动物性鲜奶油。
9. Pour the mixture into the chilled crust. Refrigerate overnight or until set. Remove cheesecake from the cake pan and serve chilled. Tap the link below and watch the video tutorial of how I remove my cheesecake from the pan, the easy and perfect way!
将(8)倒入蛋糕模,震出气泡,放进冰箱冷藏隔夜,即可享用。以下的视频教你怎么轻易的脱模。若喜欢我的食谱,可以LIKE和追随我的面书专页,不要错过最新食谱发布。
If you like my recipe, click here, LIKE & follow Miki's Food Archives Facebook page or follow us on Instagram: mfa_dingoozatfood to receive more recipe updates. Don't forget to change the setting to 'SEE FIRST' if you wish to see my post on your Facebook news feed.
Enjoy!
Watch video tutorial
Some feedback from those who have tried this recipe:
 |
| By thegrumpyrabbit |
 |
| By Mandy Kee |


0 Response to "No-Bake Lychee Cheesecake 免烤荔枝奶酪蛋糕"
Post a Comment